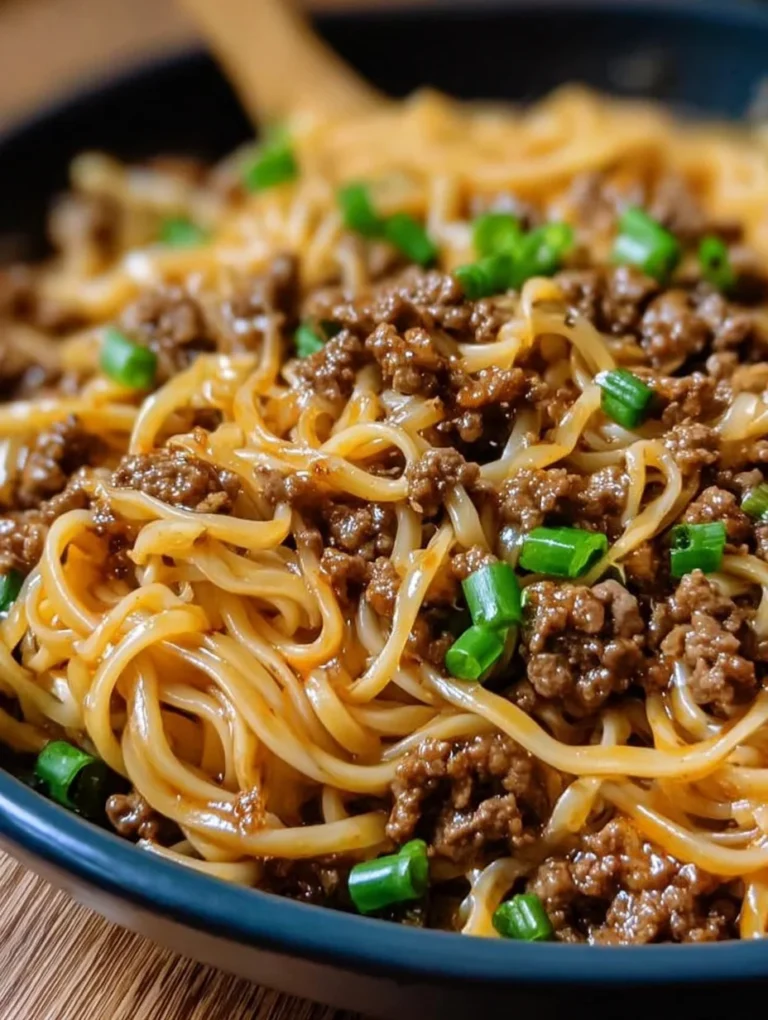
Sesame Chicken

I’ve always had a soft spot for takeout favorites that I can recreate at home, and Sesame Chicken tops that list every time. There’s something magical about that crispy, golden exterior coated in a glossy, sweet-and-savory sauce that just screams comfort food. The first time I made this homemade Sesame Chicken, my family couldn’t believe it wasn’t from our favorite Chinese spot—it was that good. If you’re craving that restaurant-style flavor without the hassle or extra cost, you’re in the right place.
What I love most about this Sesame Chicken recipe is how straightforward it is to whip up on a busy weeknight. In my experience, the key is balancing the tangy soy with a touch of honey for that perfect glaze. We’ll walk through every step together, and I promise you’ll feel like a pro chef by the end. Let’s dive into making this delicious Sesame Chicken that everyone will rave about!
Key Takeaways:
- Restaurant-quality Sesame Chicken made in under 30 minutes with simple pantry staples.
- Perfect for weeknight dinners, saving you time without sacrificing flavor.
- Irresistible sweet and savory sauce that clings to every crispy bite.
- Use cornstarch for the crispiest coating—don’t skip this step!
- Stores well for leftovers; reheat in the oven to keep it crunchy.
Why You’ll Adore This Sesame Chicken
Crispy and Tender Every Time: This Sesame Chicken delivers that perfect crunch on the outside while keeping the chicken juicy inside. I remember the first batch I tried—it was so spot-on that I ate way too much! You’ll love how easy it is to achieve without deep-frying.
Grab This Chef Knife Now - Almost Gone!

- Stays Razor-Sharp: Ice-hardened blade keeps its edge longer than ordinary knives
- Superior Grip Control: Unique finger hole design gives you perfect balance and safety
- Built to Last a Lifetime: Premium stainless steel blade with elegant beech wood handle
- ✓ Finally, a knife that stays sharp and feels comfortable in my hand
- ✓ Professional quality without the premium price tag
- ✓ Makes meal prep faster and more enjoyable
⏰ Only a few items left in stock - order soon
Quick and Family-Friendly: Ready in just 25 minutes, this recipe is a lifesaver for busy evenings. The kids go wild for the sweet sauce, and it’s versatile enough to pair with rice or veggies. Honestly, it’s become our go-to for cozy nights in.
Customizable Flavor Burst: The sauce in this Sesame Chicken is a game-changer—sweet, tangy, and nutty from sesame seeds. You can tweak the heat level to your liking, making it ideal for spice lovers or those who prefer mild. It’s that homemade touch that elevates it beyond takeout.
Healthier Homemade Twist: Unlike restaurant versions loaded with excess oil, our Sesame Chicken uses a light coating for guilt-free indulgence. We bake or air-fry options too, so you feel great about serving it often. Trust me, once you try it, you’ll be hooked!
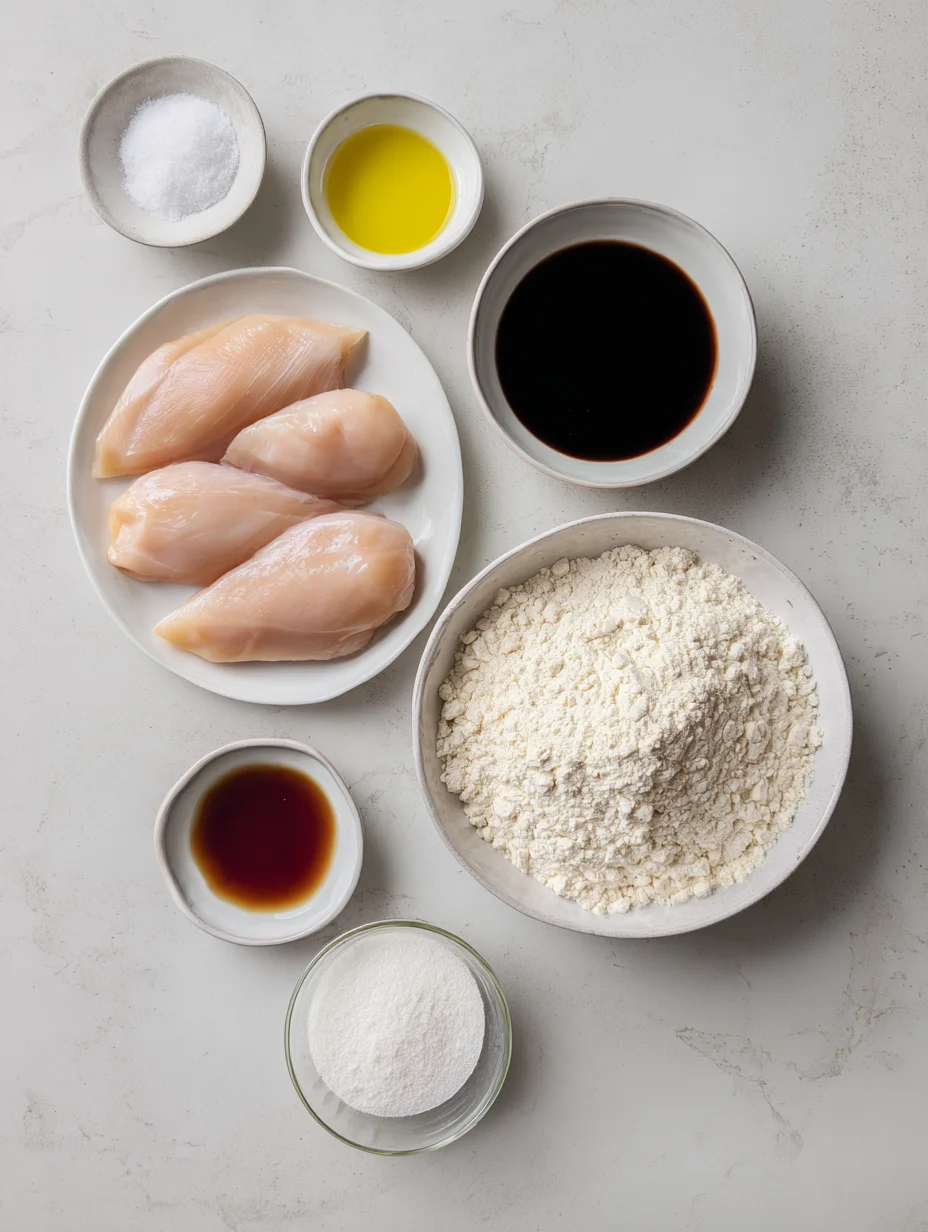
Essential Ingredients for Sesame Chicken
Chicken Thighs: Boneless, skinless chicken thighs provide the best tenderness and flavor for this dish. They’re forgiving when cooking and absorb the sauce beautifully. In my kitchen, I always opt for thighs over breasts to avoid dryness—it’s a small swap that makes a big difference in your Sesame Chicken.
Grab This Kitchen Scale Now — Best Precision Pick!

- Razor-Accurate Every Time: Dual-increment precision down to 0.1g — perfect for baking, meal prep, and portion control with g, oz, ml, and fl'oz modes.
- Smart Removable Bowl Design: Detachable bowl doubles as a protective case for compact storage. Tare function lets you weigh ingredients in any container with zero fuss.
- Built for Everyday Convenience: Auto-zero, tare function, low battery alert, overload indicator, and 2-minute auto-off to extend battery life — all in a sleek stainless steel build.
- ✓ "Perfect for baking — precise, lightweight, and stores easily without wasting counter space"
- ✓ "A game changer! Weighing ingredients is now way more accurate than measuring cups"
- ✓ "Love the 0.1g precision and backlight — best food scale I've owned. Highly recommend!"
⏰ Only a few items left in stock - order soon
Soy Sauce: This is the backbone of the savory umami in the sauce. Low-sodium versions keep things balanced without overpowering the sweetness. I’ve found that tamari works great as a gluten-free alternative if needed.
Honey and Sesame Seeds: Honey adds that glossy sweetness, while sesame seeds bring nutty crunch and authentic flair to the Sesame Chicken. Toast the seeds lightly for extra aroma—it’s a step I never skip. Together, they create that irresistible glaze everyone craves.
How to Make Sesame Chicken
Prepare the Chicken and Coating
Start by cutting your chicken into bite-sized pieces and tossing them in a simple mix of cornstarch, salt, and pepper—this ensures maximum crispiness. In my experience, letting it sit for 10 minutes helps the coating adhere perfectly. Meanwhile, whisk up the sauce with soy, honey, rice vinegar, garlic, and ginger for that bold flavor. This prep sets the stage for your standout Sesame Chicken.
Cook the Chicken to Golden Perfection
Heat oil in a skillet over medium-high and add the coated chicken in batches to avoid crowding—watch it sizzle and turn golden in about 5 minutes per side. The aroma will fill your kitchen, making it hard to wait! Flip carefully for even browning, and remove once cooked through. This step is key to that crave-worthy texture in every piece.
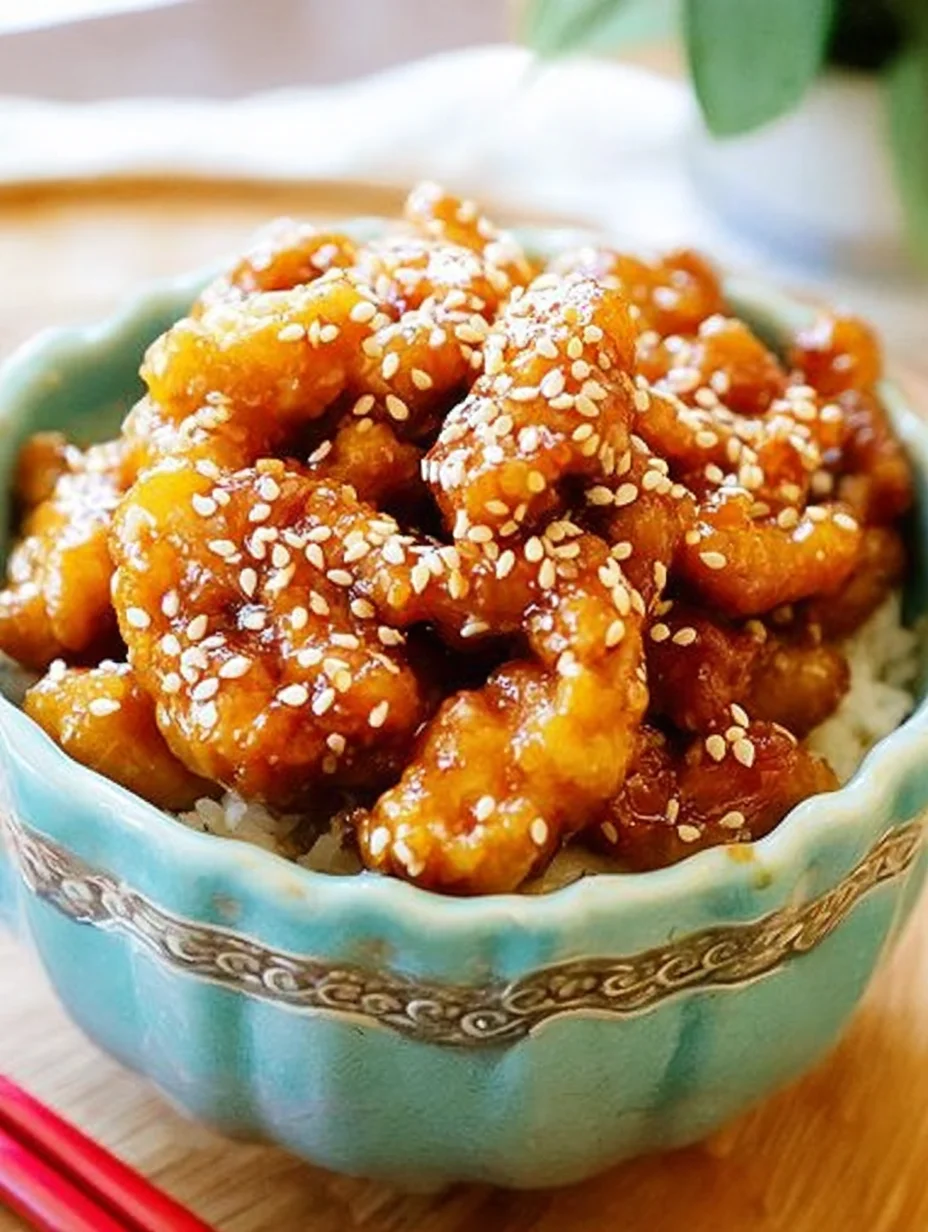
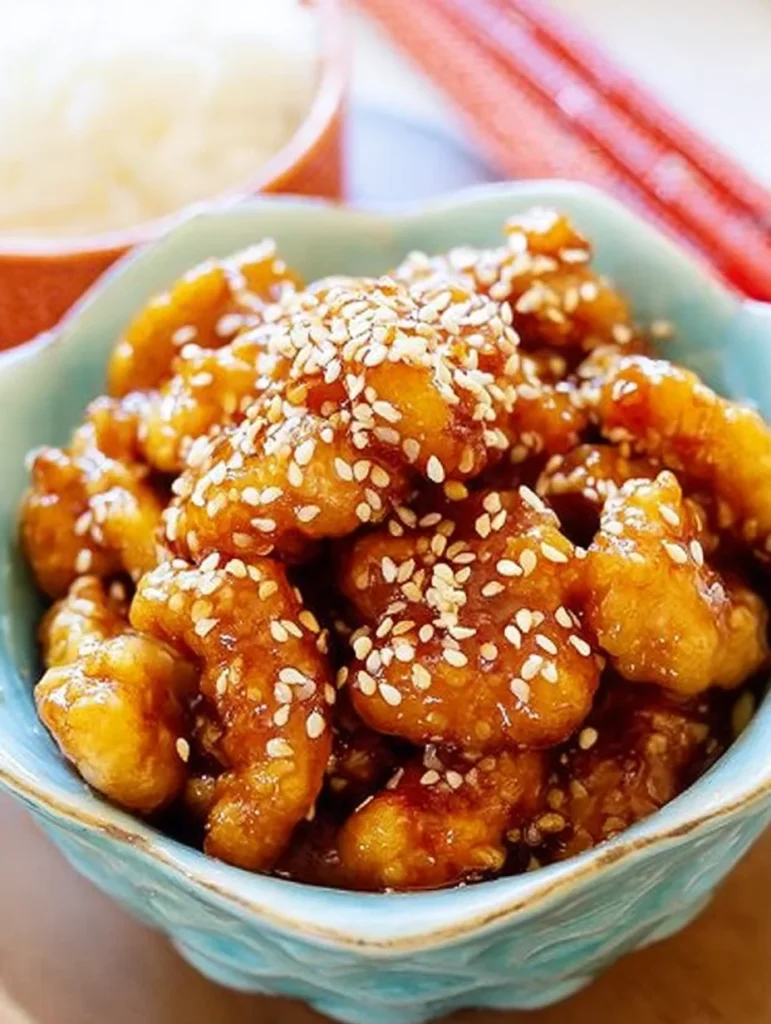
Toss in the Irresistible Sauce
Pour the sauce into the pan, letting it bubble and thicken for a couple of minutes before adding the chicken back in. Stir everything to coat evenly, then sprinkle with sesame seeds and green onions. Your Sesame Chicken is ready to serve piping hot— the glossy finish is pure magic! For a healthier twist, check out our baked honey sesame chicken variation.
Ingredients
- 1 lb boneless, skinless chicken thighs, cut into bite-sized pieces
- 1/2 cup cornstarch
- 1/4 cup soy sauce (low-sodium preferred)
- 1/4 cup honey
- 2 tbsp rice vinegar
- 2 garlic cloves, minced
- 1 tbsp grated fresh ginger
- 2 tbsp sesame oil, divided
- 2 tbsp sesame seeds, toasted
- 2 green onions, sliced
- Salt and pepper, to taste
- Vegetable oil, for frying
Sesame Chicken Instructions
- In a bowl, toss chicken pieces with cornstarch, salt, and pepper until evenly coated. Let sit for 10 minutes.
- Whisk together soy sauce, honey, rice vinegar, minced garlic, grated ginger, and 1 tbsp sesame oil in a small bowl to make the sauce.
- Heat 1 tbsp sesame oil and a splash of vegetable oil in a large skillet over medium-high heat. Add chicken in a single layer and cook for 5-6 minutes per side until golden and cooked through. Work in batches if needed.
- Remove chicken and set aside. Pour sauce into the skillet, bring to a simmer, and cook for 2 minutes until thickened.
- Add chicken back to the pan, toss to coat, and cook for 1-2 more minutes. Sprinkle with toasted sesame seeds and green onions.
- Serve hot over rice or noodles. Enjoy your homemade Sesame Chicken!
Pro Tips for the Best Sesame Chicken
Double the Sauce: If you love extra saucy dishes, make a double batch—it reheats beautifully and clings perfectly.
Air Fry Instead: For less oil, air-fry the coated chicken at 400°F for 12-15 minutes, shaking halfway through.
Fresh Ginger Matters: Grate it fresh for brighter flavor; powdered works in a pinch but won’t pack the same punch.
You Must Know
- This Sesame Chicken is naturally gluten-free if using tamari instead of soy sauce.
- The sauce thickens as it cools, so serve immediately for the best texture.
- Use a thermometer to ensure chicken reaches 165°F internally for safety.
- Sesame seeds should be toasted lightly to release their oils and enhance nuttiness.
How to Store Sesame Chicken
Let your Sesame Chicken cool completely before transferring it to an airtight container—it’ll keep in the fridge for up to 3 days without losing too much crispiness. For longer storage, freeze portions for up to 2 months, though the coating might soften a bit. Reheat in the oven at 350°F for 10-15 minutes to revive that crunch, or microwave gently with a damp paper towel over the top.
Customizing Your Sesame Chicken
Swap chicken for tofu or shrimp if you’re vegetarian— the sauce works wonders on any protein. Add a kick with red pepper flakes or sriracha for spicy Sesame Chicken lovers. For a lighter version, bake instead of frying; see our baked honey sesame chicken recipe for inspiration. Experiment with pineapple chunks for a tropical twist—it’s endlessly adaptable!
What to Serve with Sesame Chicken
Pair this Sesame Chicken with steamed jasmine rice to soak up the amazing sauce, or try fried rice for extra texture. A simple cucumber salad with sesame dressing adds refreshing crunch, while broccoli stir-fry brings in those greens. For drinks, iced green tea or a crisp white wine like Riesling cuts through the sweetness perfectly—it’s a meal that feels complete and balanced.
Sesame Chicken
Easy, healthy and homemade Chinese Sesame Chicken recipe with sesame sauce. This is the BEST recipe you'll find online and tastes just like takeout restaurants.
Timing
Recipe Details
Ingredients
- 01 8 oz boneless and skinless chicken breast ((230g, cut into strips))
- 02 oil ((for deep-frying))
- 03 2 tablespoons soy sauce
- 04 1 tablespoon Chinese rice vinegar ((or apple cider vinegar))
- 05 4 tablespoons sugar
- 06 2 teaspoons cornstarch
- 07 1/3 cup water
- 08 1/2 cup all-purpose flour ((sifted))
- 09 1/4 cup cornstarch
- 10 1/2 teaspoon baking powder
- 11 1 egg white
- 12 1/3 cup cold water
- 13 1 tablespoon oil
- 14 1 pinch salt
- 15 2 tablespoons oil
- 16 1 clove garlic ((minced))
- 17 white sesame seeds ((for garnishing))
Instructions
Mix all the ingredients in the Sauce until well combined. Set aside.
Mix all the ingredients for the Frying Batter in a bowl until well combined. Stir a few times to ensure there are no lumps and the batter is smooth. Add the chicken to the batter and stir to coat it evenly.
Heat 2 to 3 inches (5 to 7.5 cm) of oil in a wok or stockpot to 350°F (175°C) for deep-frying. Gently drop the chicken into the hot oil and immediately loosen them with a spatula to prevent the pieces from clumping together.
Deep-fry the chicken until golden brown. Remove the chicken from the oil using a strainer or slotted spoon, allowing the excess oil to drain by placing the chicken on a dish lined with paper towels. Discard the oil.
Heat 2 tablespoons of oil in a wok or skillet over high heat. Add the garlic and stir-fry until fragrant, then pour in the sauce.
As soon as the sauce thickens, add the fried chicken to the wok or skillet. Stir continuously until the chicken is evenly coated with the sauce. Dish out, garnish with white sesame, and serve immediately with steamed rice.
FILED UNDER:
NUTRITION FACTS (PER SERVING)
Nutrition information is calculated using an ingredient database and should be considered an estimate. In cases where multiple ingredient alternatives are given, the first listed is calculated for nutrition. Garnishes and optional ingredients are not included.
Frequently Asked Questions About Sesame Chicken
Can I make Sesame Chicken ahead of time?
Yes, you can prep the chicken and sauce up to a day in advance, storing them separately in the fridge. Cook just before serving to maintain crispiness, as the coating can get soggy if done too early. It’s a great time-saver for dinner parties!
How long does Sesame Chicken last in the fridge?
Your Sesame Chicken will stay fresh for 3-4 days when stored properly in an airtight container. Beyond that, freeze it to extend usability up to 2 months. Always reheat thoroughly to enjoy it safely.
Is Sesame Chicken gluten-free?
It can be—use tamari or gluten-free soy sauce and ensure your cornstarch is certified gluten-free. The rest of the ingredients are naturally GF, making this a safe choice for many diets.
Can I air-fry the Sesame Chicken?
Absolutely! Coat and air-fry at 375°F for 12-15 minutes, tossing halfway. This method cuts oil while keeping it deliciously crispy—your Sesame Chicken will still shine.
What’s the best oil for frying Sesame Chicken?
Neutral oils like vegetable or canola work best for high heat without altering flavors. Avoid olive oil, as it can burn and turn bitter during cooking.
How do I make Sesame Chicken spicier?
Add chili garlic sauce or red pepper flakes to the sauce mixture while simmering. Start with 1 tsp and adjust to taste— it elevates the classic Sesame Chicken without overwhelming it.
Can I use chicken breast instead?
Yes, but thighs are juicier; if using breast, marinate briefly in a bit of soy to keep it moist. Slice thinly for even cooking in your Sesame Chicken.
Why is my Sesame Chicken sauce too thick?
If it’s overly thick, thin it with a splash of water or chicken broth while heating. Simmer gently to reach the desired glossy consistency without diluting the flavor.
Final Thoughts
There’s nothing quite like digging into a plate of homemade Sesame Chicken that tastes just like the real deal but with all the love you put into it. From the crispy bites to that sticky sauce, it’s a recipe that’ll become a staple in your home—I know it has in mine. Give this Sesame Chicken a try tonight and let me know how it turns out; share your tweaks in the comments below!